Stan's first task is to create Folders for the three departments within the ZAcme Folder, along with a public view of those Folders. Zope joins these two tasks together when creating Folders.
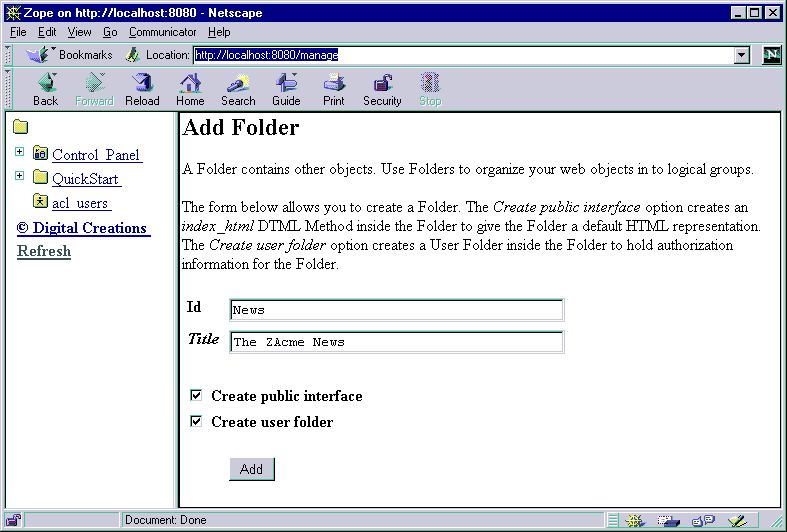
The first Folder Stan creates, he decides to call News , the Folder in which the PR department will be responsible primarily for updating. To add the new Folder Stan follows these steps:
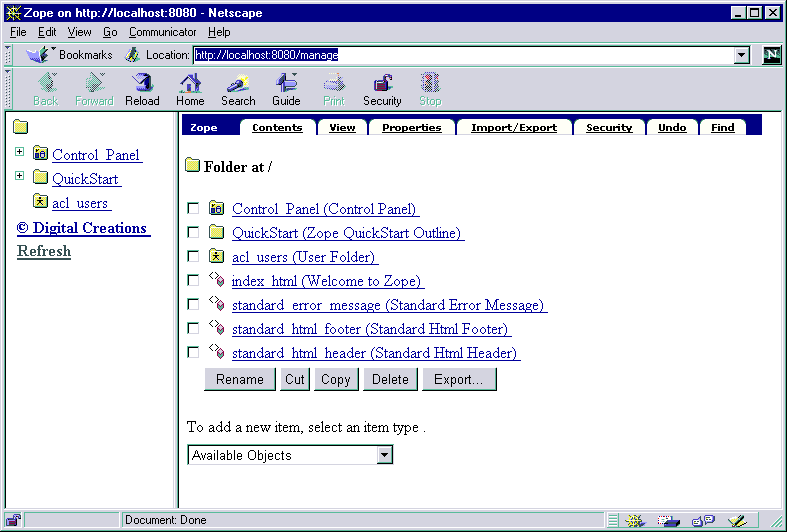
The grey boxes at the top of the workspace are the object tabs . Object tabs are used to switch between the different views. The tab of the current view selected is a lighter color than the other object tabs. See "Object Reference" for an explanation of the different views for each object.
The main view used in Zope is a Folder's Contents view (Figure 1 ). The list of items with checkboxes in front of them are the Folder items . These are the objects in the current Folder. The checkboxes are used to select objects for Folder actions . The buttons just below the Folder items are the Folder actions. These buttons operate on items whose checkboxes are selected. The drop-down list lets you add a new object to the current Folder.
|
He makes sure the "Create public interface" and "Create user folder" options are selected. With these selected, the "Create public interface" will create a new DTML Document with the id, index_html, and a User Folder created in the under the new Folder. The index_html document is displayed when the Folder object is called via a URL. This is what is also known as the Folder's Public Interface . Those familiar with traditional Web publishing will recognize this as the same behavior as an index.html or default.htm document. The "Create user folder" option will create the User Folder with acl_users under this added folder.
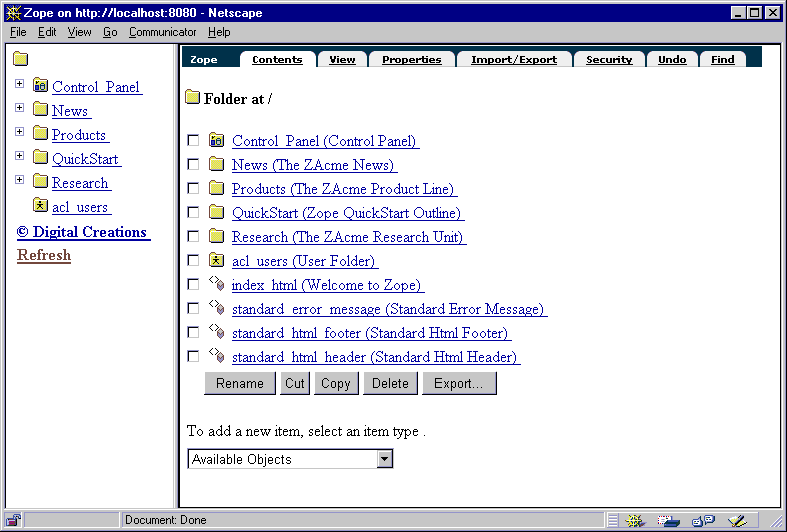
The first part of his task is completed! His /manage screen should now look like Figure 3 .
Notice the "+" marks next to the new folders in the navigation frame. These marks indicate that the corresponding folders are expandable. Remember that Stan chose the option to create User Folders when adding the new Folders. Since User Folders are a special type of folder-like object, they too will appear in the navigation frame when the department Folders are expanded.